



 한국어
한국어

The Numbers That Should Worry Every Older-Home Owner
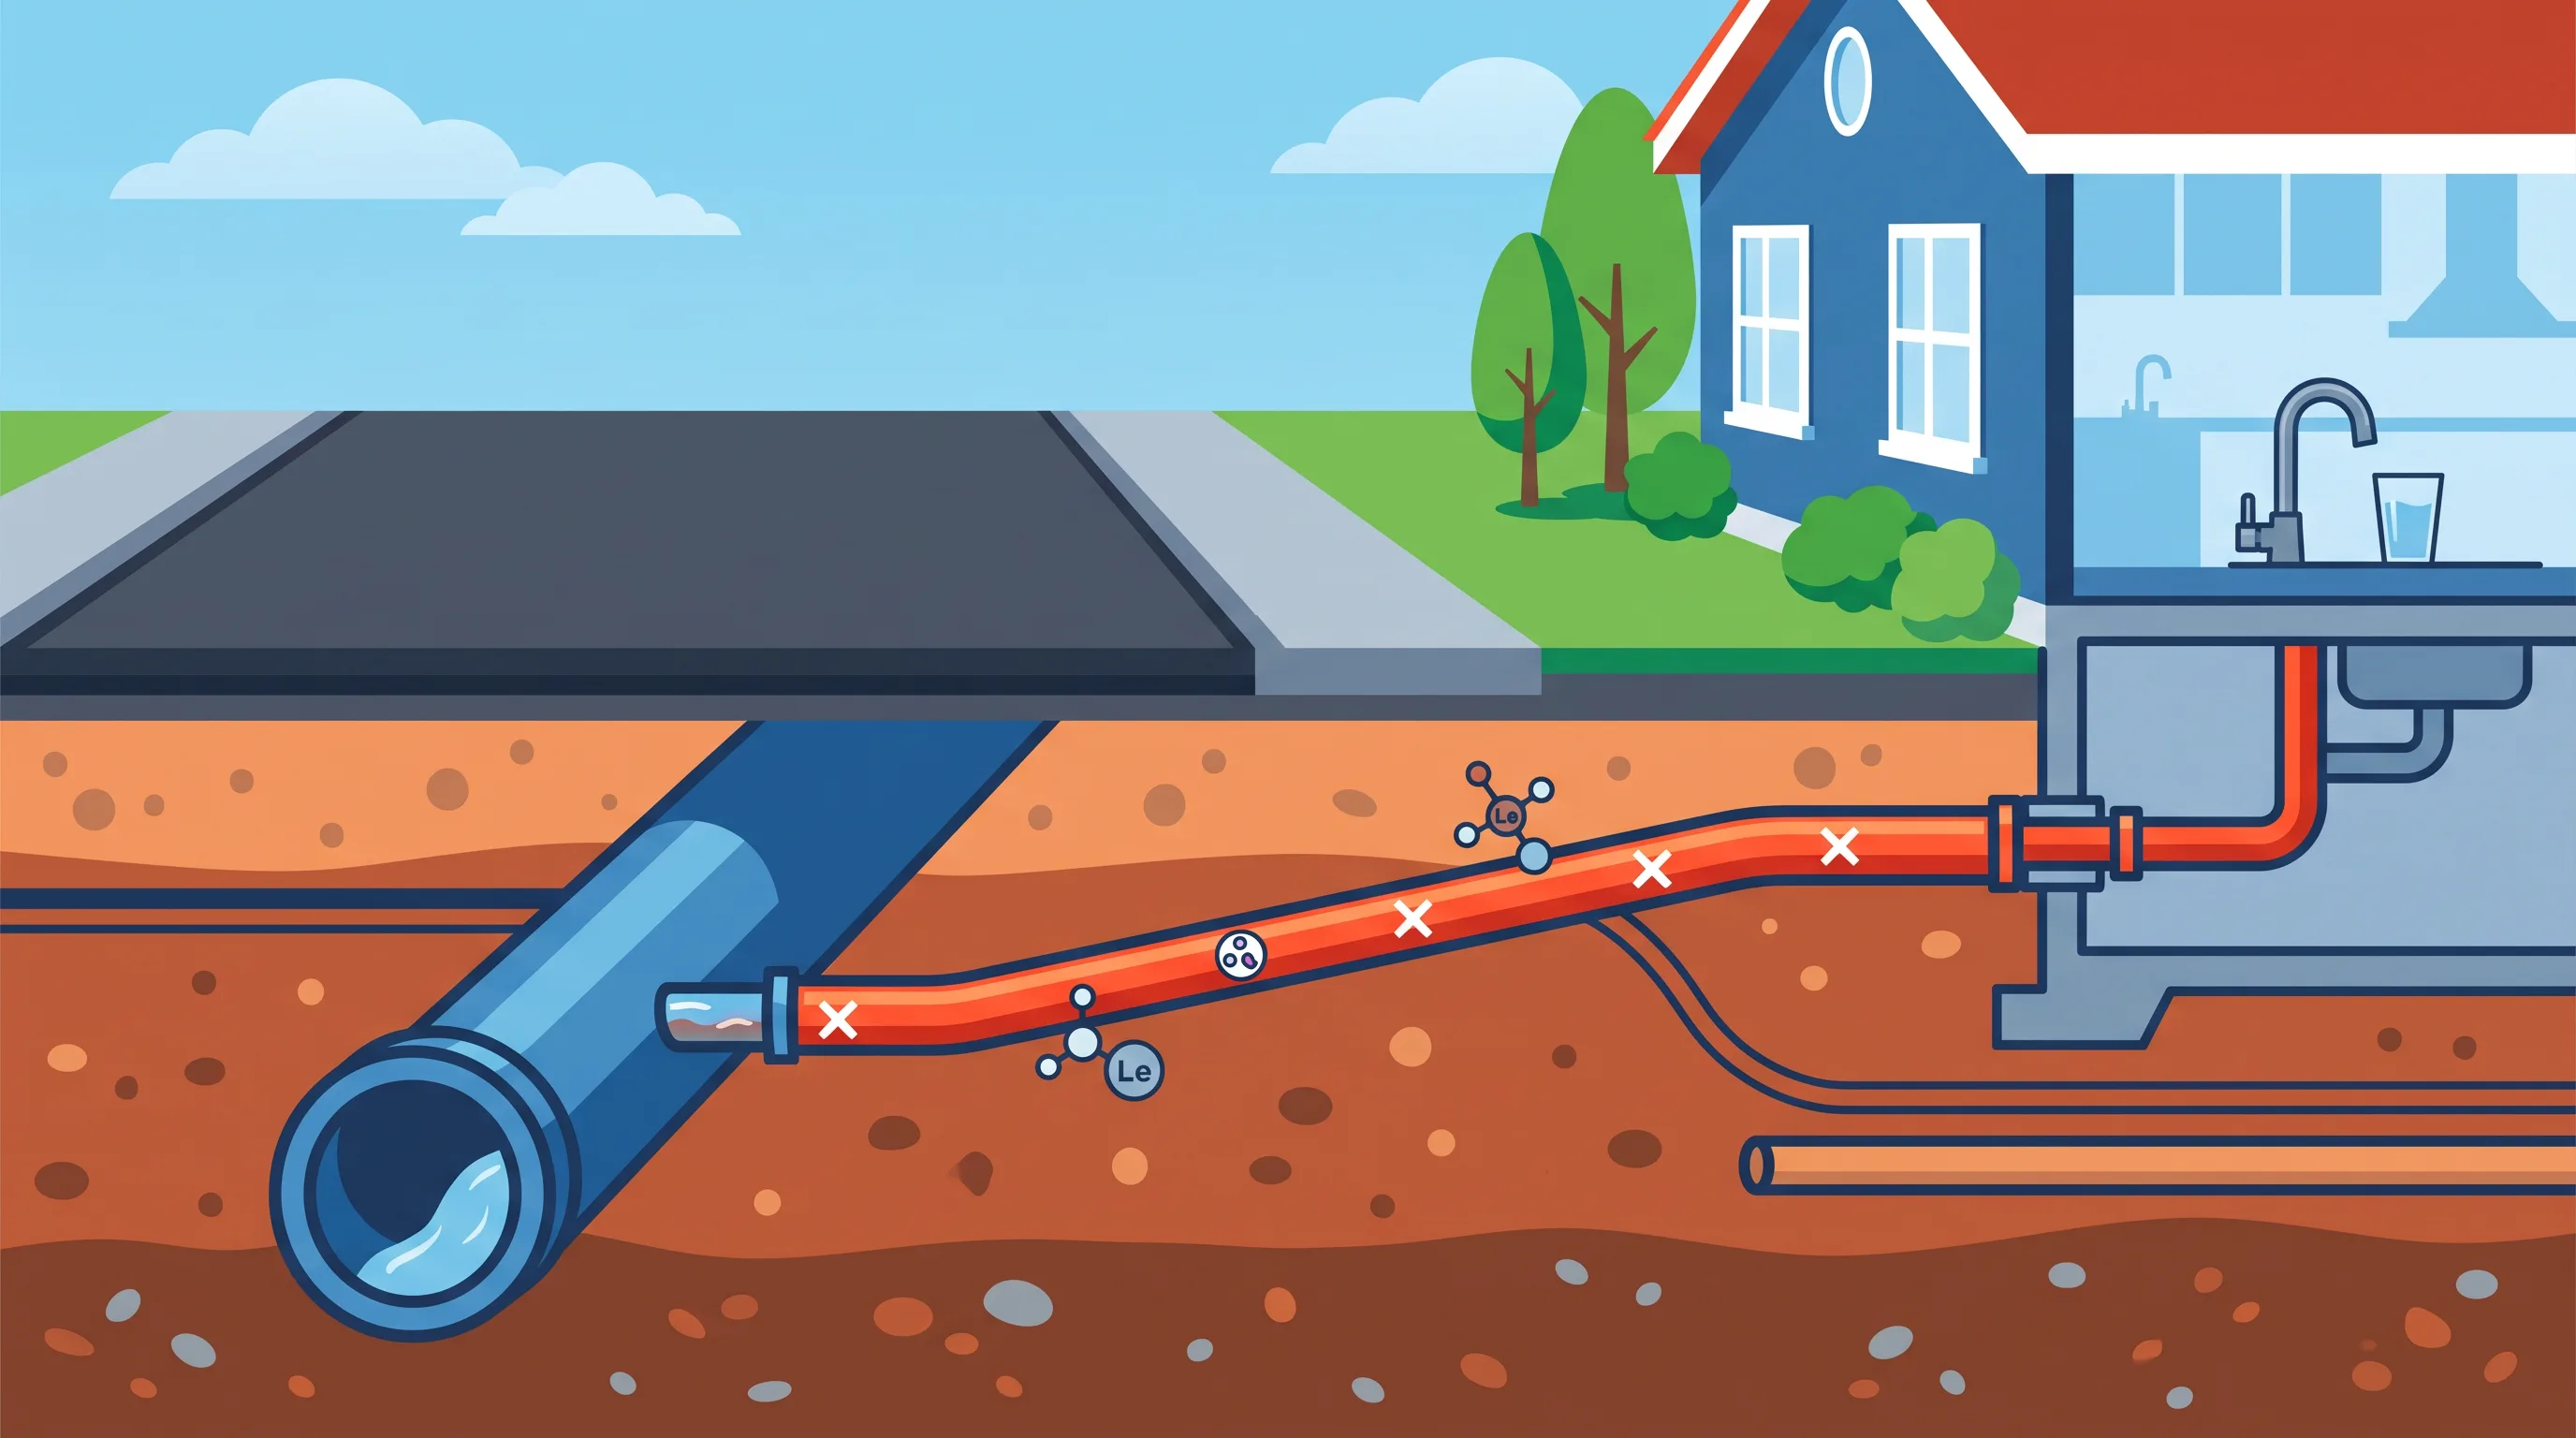
The EPA estimates roughly 9 million lead service lines still deliver water to American homes as of 2026. That number isn’t theoretical. If your house was built before 1986—when Congress finally banned new lead pipe installations—the water coming out of your kitchen tap has a real chance of carrying lead particulate every single day.
Here’s what the data says: drinking water accounts for approximately 20% of total lead exposure in adults, and the figure climbs higher for formula-fed infants whose bottles are mixed with tap water. The CDC has been unambiguous for years: there is no safe blood lead level. None. Even concentrations below 5 micrograms per deciliter have been linked to measurable IQ drops in children, and the neurological damage doesn’t reverse.
In May 2026, the EPA announced another $2.9 billion tranche of Drinking Water State Revolving Fund money specifically earmarked for lead service line identification and replacement. Texas got $76.6 million. Indiana received $128.6 million. The money is flowing—but the replacement timeline for 9 million pipes stretches years, possibly decades. If you live in an older home, waiting for the utility crew to dig up your street is not a plan.
Where the Lead Actually Comes From
Most people assume lead contamination means the water leaving the treatment plant is dirty. It’s almost never that. Municipal water treatment in the United States is genuinely high-quality at the plant exit. The problem is the journey from the plant to your glass.
There are three distinct contamination points in a pre-1986 home:
1. The service line. This is the pipe connecting the water main under your street to your house. In homes built before the 1950s, this pipe is often pure lead. These are the pipes the EPA’s $15 billion infrastructure program is targeting—but replacement prioritizes schools and daycare zones first. Your residential street may not make the list for years.
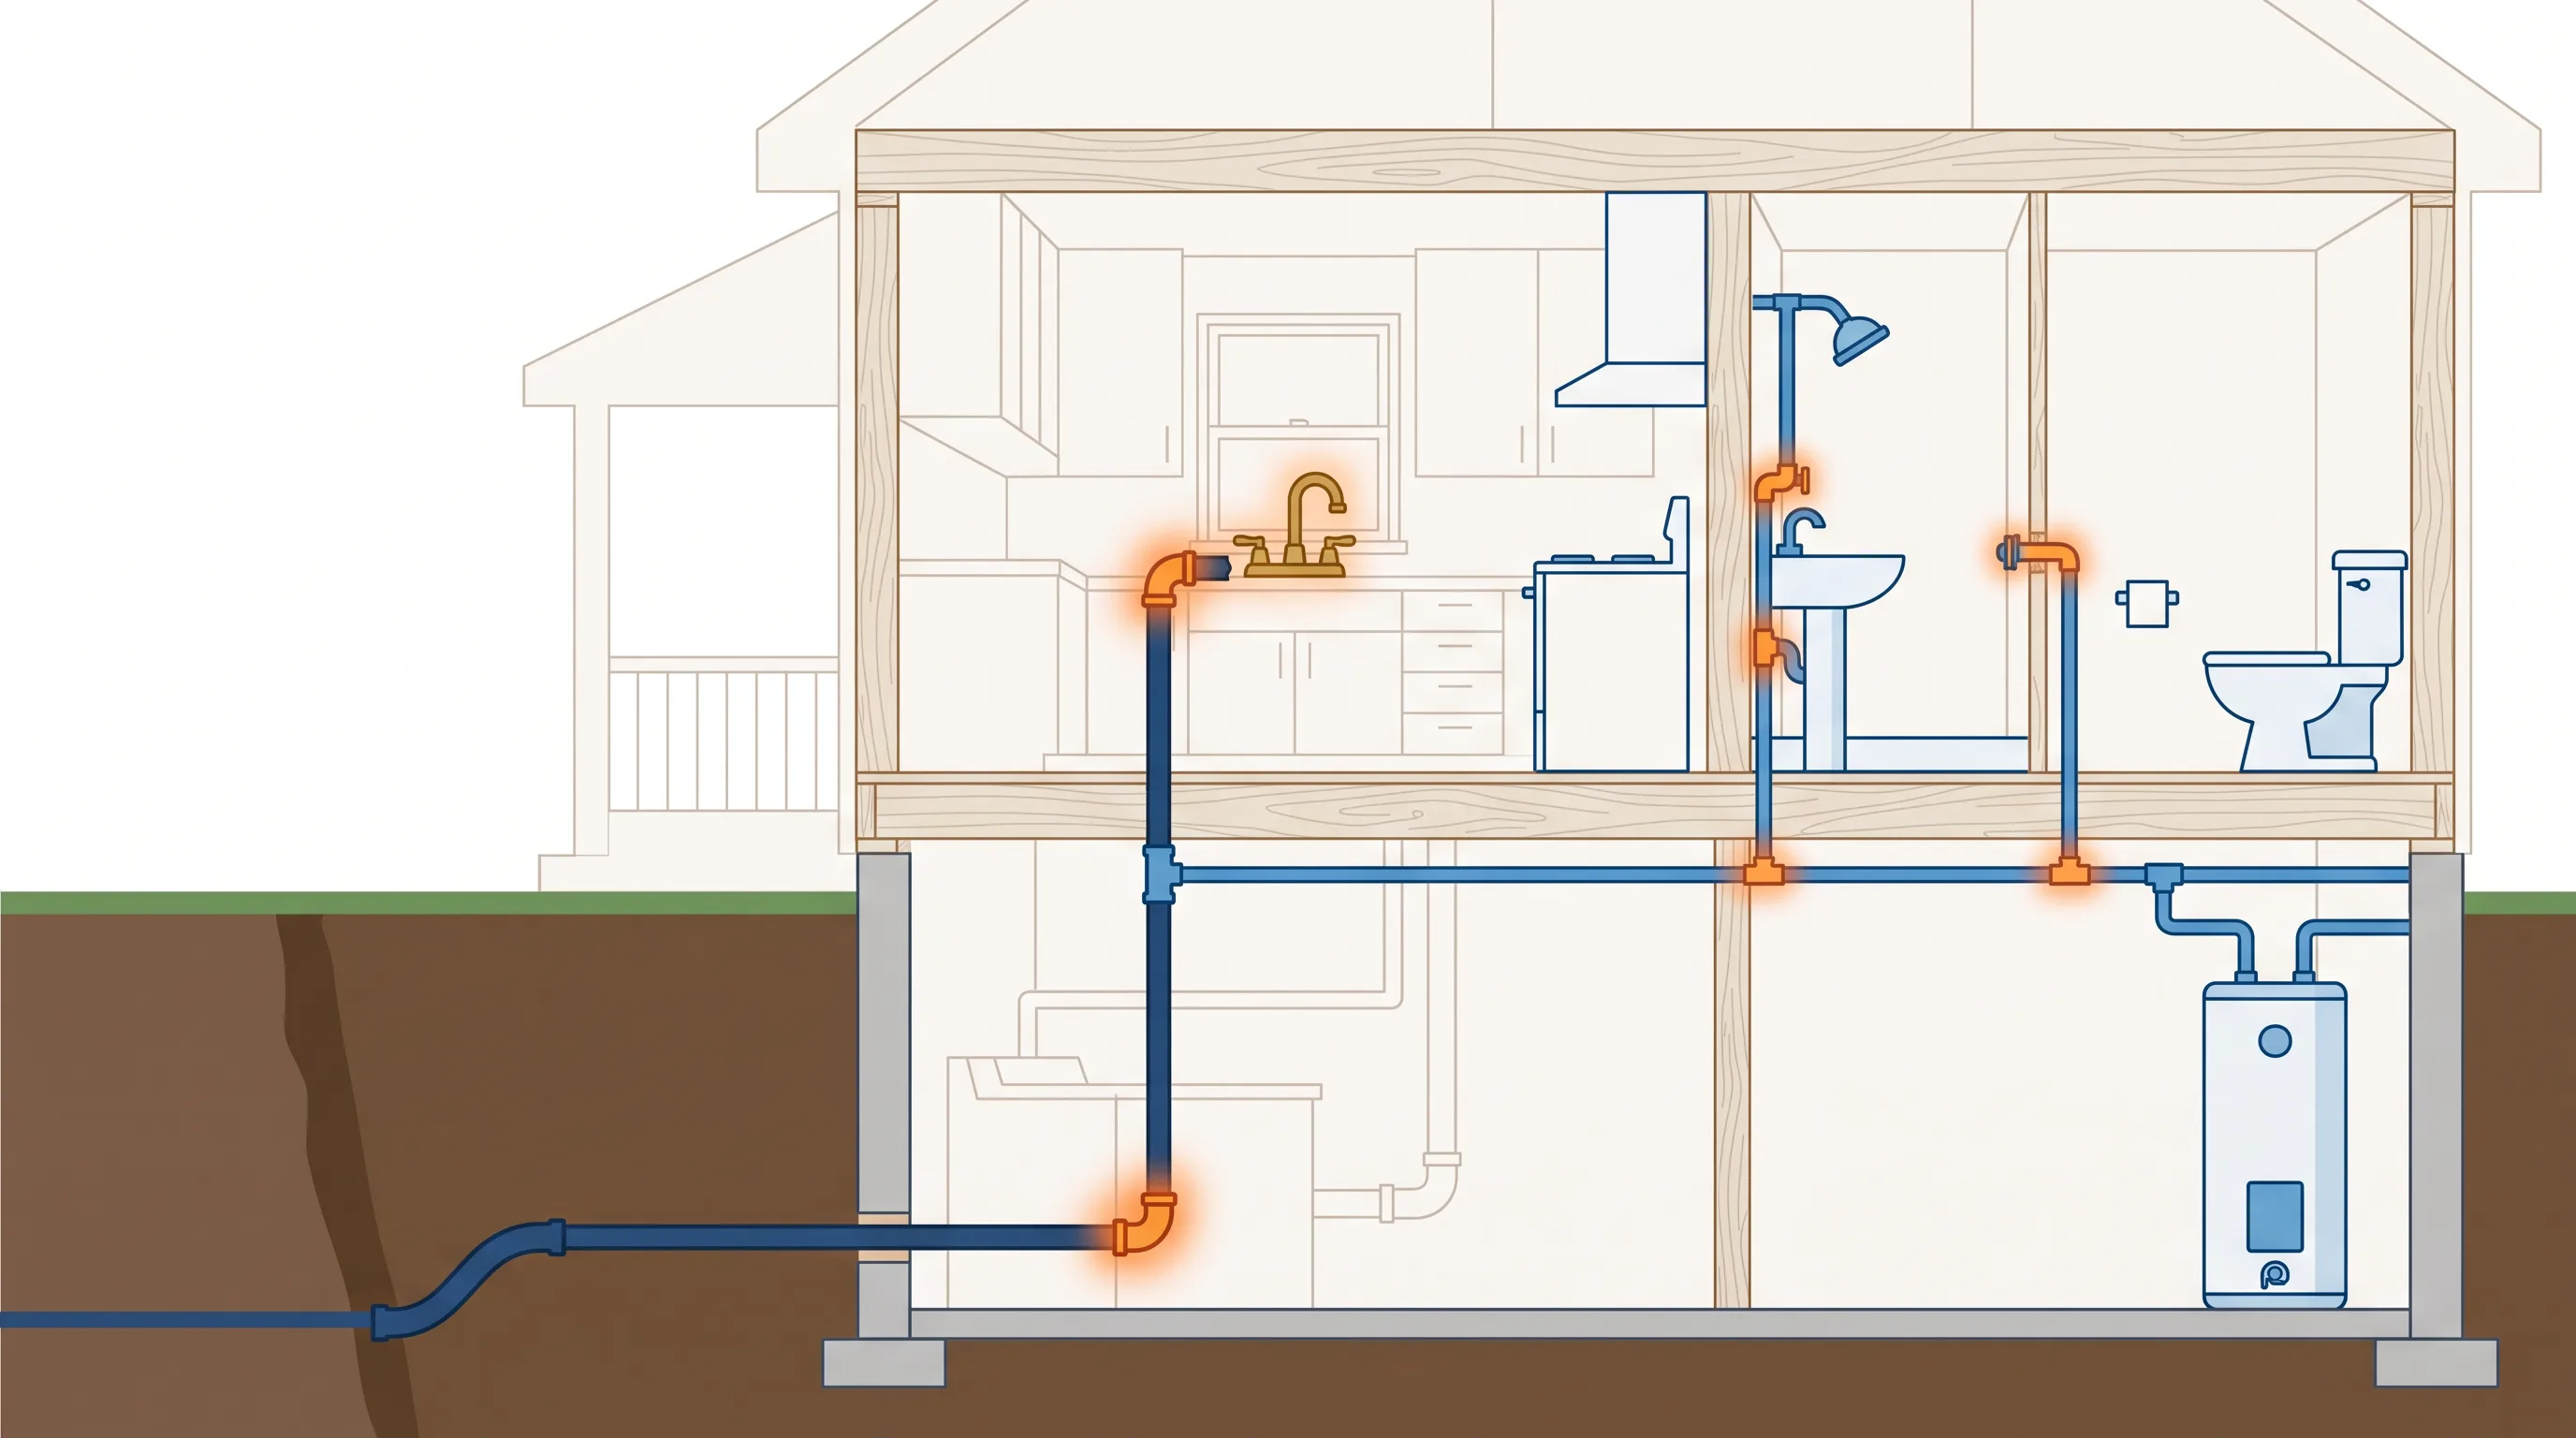
2. Interior plumbing. Even if your service line is copper, the solder used to join copper pipes before 1986 typically contained 50% lead. Every joint in your basement ceiling or behind your kitchen wall is a potential leaching point. The 1986 Safe Drinking Water Act amendments dropped the legal limit for solder lead content to 0.2%, but that only applies to work done after the ban.
3. Brass fixtures and faucets. Until 2014, brass plumbing fixtures could legally contain up to 8% lead. That “vintage” kitchen faucet that came with the house? Its internal brass components may be steadily contributing lead to every glass of water you pour—especially the first draw after the water has been sitting in the fixture overnight.
The Chemistry of Corrosion: Why Your Water Might Be Fine Today and Toxic Tomorrow
Lead doesn’t dissolve into water like salt. The process is electrochemical. Inside a lead or lead-soldered pipe, a thin layer of oxidation—lead oxide or lead carbonate—naturally forms on the interior wall. This layer can act as a protective barrier. When the water chemistry is stable, it stays put.
But water chemistry is never perfectly stable. Three common disruptions strip that protective layer:
| Trigger | What Happens | Real-World Example |
|---|---|---|
| pH drop below 6.5 | Acidic water dissolves the oxide barrier, exposing bare lead | Flint, Michigan, 2014: switching water source dropped pH, leached lead from 100,000+ service lines |
| Chloride level spike | Chloride ions compete with carbonate for lead binding, forming soluble lead-chloride complexes | Road salt runoff in winter months raises chloride in groundwater-fed systems across the Midwest |
| Orthophosphate interruption | Water utilities add orthophosphate to maintain the protective film; any interruption in dosing re-exposes pipes | Newark, New Jersey, 2019: phosphate feed system malfunction caused lead levels to spike to 57 ppb in some homes |
The practical takeaway: your water utility’s annual Consumer Confidence Report (CCR) shows averages. But lead release is an episodic event. A pH dip during a reservoir turnover, a pump station switch that stirs sediment, a fire hydrant flushing on your block—any of these can cause a temporary spike that won’t show up in the annual report but will show up in your glass.
Testing Your Water: Stop Guessing, Start Measuring
The only way to know if lead is in your water is to test it. Visual inspection doesn’t work. Lead is colorless, odorless, and tasteless in water. The metallic taste people sometimes associate with lead is usually iron or copper.
Option 1: EPA-certified lab test. This is the gold standard. You request a sample kit, follow the first-draw instructions (collect water after it’s been sitting in pipes for 6-8 hours, typically first thing in the morning), and mail it back. Results come back in 1-2 weeks with detection limits down to 1 part per billion. Cost: $25-50 depending on the lab. Look for labs accredited under the EPA’s National Environmental Laboratory Accreditation Program (NELAP).
Option 2: Home test strips. These exist, but I’ll be blunt: most consumer-grade lead test strips have detection limits around 15 ppb—which is already above the EPA’s action level of 15 ppb and well above the 1 ppb maximum contaminant level goal (MCLG). If the strip shows negative, it doesn’t mean your water is lead-free. It means it’s below 15 ppb, which still isn’t safe by CDC standards.
Option 3: Check your home’s birth certificate. Find your property’s plumbing permit records. If your home was built before 1986 and hasn’t had a full plumbing renovation, assume lead solder is present. If it was built before the 1950s in a Northeastern or Midwestern city, assume the service line itself is lead. The EPA’s Lead and Copper Rule Improvements (finalized 2024) requires water systems to publish service line material inventories—check your utility’s website for a map.
NSF 53: The Only Certification That Matters for Lead Removal
When you walk into a hardware store or browse Amazon for water filters, every product claims to remove “contaminants.” That word is legally meaningless without a specific certification number attached to it. For lead, the number is NSF/ANSI 53.
NSF/ANSI 53 is the “Health Effects” standard. It tests a filter’s ability to reduce specific contaminants with known health impacts—lead, arsenic, mercury, cysts, asbestos, and dozens of volatile organic compounds. Here’s what the lead test actually involves:
The filter is challenged with water containing lead at 150 parts per billion (ppb)—that’s 10 times the EPA action level of 15 ppb, simulating a severe contamination event. The water is run through the filter at the manufacturer’s claimed flow rate. Samples are taken at multiple points across the filter’s rated lifespan: at 1%, 25%, 50%, 75%, and 100% of the claimed capacity. Every single sample must show lead concentration below 10 ppb. If any sample at any life stage exceeds 10 ppb, the filter fails.
This matters because a filter that works at gallon 1 can lose lead-removal capacity by gallon 500. The NSF 53 protocol catches that. Filters without this certification—and there are many—have not been independently verified to maintain lead removal across their entire service life.
NSF 53 certified filters fall into several technology categories:
| Technology | Lead Removal Mechanism | Typical Removal Rate | Notes |
|---|---|---|---|
| Activated carbon block (with adsorptive media) | Physical adsorption + ion exchange sites bind lead ions to carbon surface | 93-99% | Must specify lead removal in certification; standard carbon blocks without adsorptive additives do NOT remove lead |
| Reverse osmosis (RO) membrane | Semi-permeable membrane physically rejects lead ions (0.0001 micron pores vs. lead ions at ~0.0003 micron effective diameter) | 95-99.9% | Most reliable mechanism; also removes dissolved solids, arsenic, chromium-6, and PFAS |
| KDF (Kinetic Degradation Fluxion) media | Redox reaction: copper-zinc alloy exchanges electrons with lead ions, converting dissolved lead to insoluble particulate trapped in the media bed | 90-98% | Often paired with carbon for multi-stage filtration; effective at high flow rates but requires periodic backwashing |
| Distillation | Water boiled, steam condensed—lead remains in boiling chamber as it doesn’t vaporize | 99.9%+ | Extremely effective but slow (4-6 hours per gallon), high electricity use, removes beneficial minerals |
The filter you buy should have “NSF/ANSI 53” printed on the packaging or listed in the product specifications on the manufacturer’s website. Not “tested to NSF standards.” Not “meets NSF requirements.” The exact phrase must be “NSF/ANSI 53 certified” with a valid certification number you can look up on NSF’s public listing database at info.nsf.org.
Point-of-Use vs. Whole-House: Where to Put the Filter
This is where a lot of homeowners spend money in the wrong place. A filtration strategy for lead needs to match how lead enters your water—and how you actually use water in your home.
Whole-house filters (point-of-entry) treat all water entering the house. They’re the right solution for sediment, iron, sulfur odor, and hardness. For lead, they’re usually overkill—and often ineffective at the flow rates a whole house demands. A whole-house carbon tank sized for 10-15 gallons per minute of shower+laundry+dishwasher flow simply doesn’t provide enough contact time for meaningful lead adsorption. If you need whole-house treatment for other issues, install a dedicated lead-certified point-of-use filter at the kitchen sink for drinking and cooking water.
Point-of-use filters—under-sink or countertop—are the correct approach for lead. They treat only the water you drink and cook with. Flow rates are lower (0.5-1.0 GPM), contact time with filtration media is much longer, and the filtration can be more aggressive because you’re not trying to push water through at shower-flow volumes. This is where NSF 53 certified systems deliver real protection.
The two dominant point-of-use form factors:
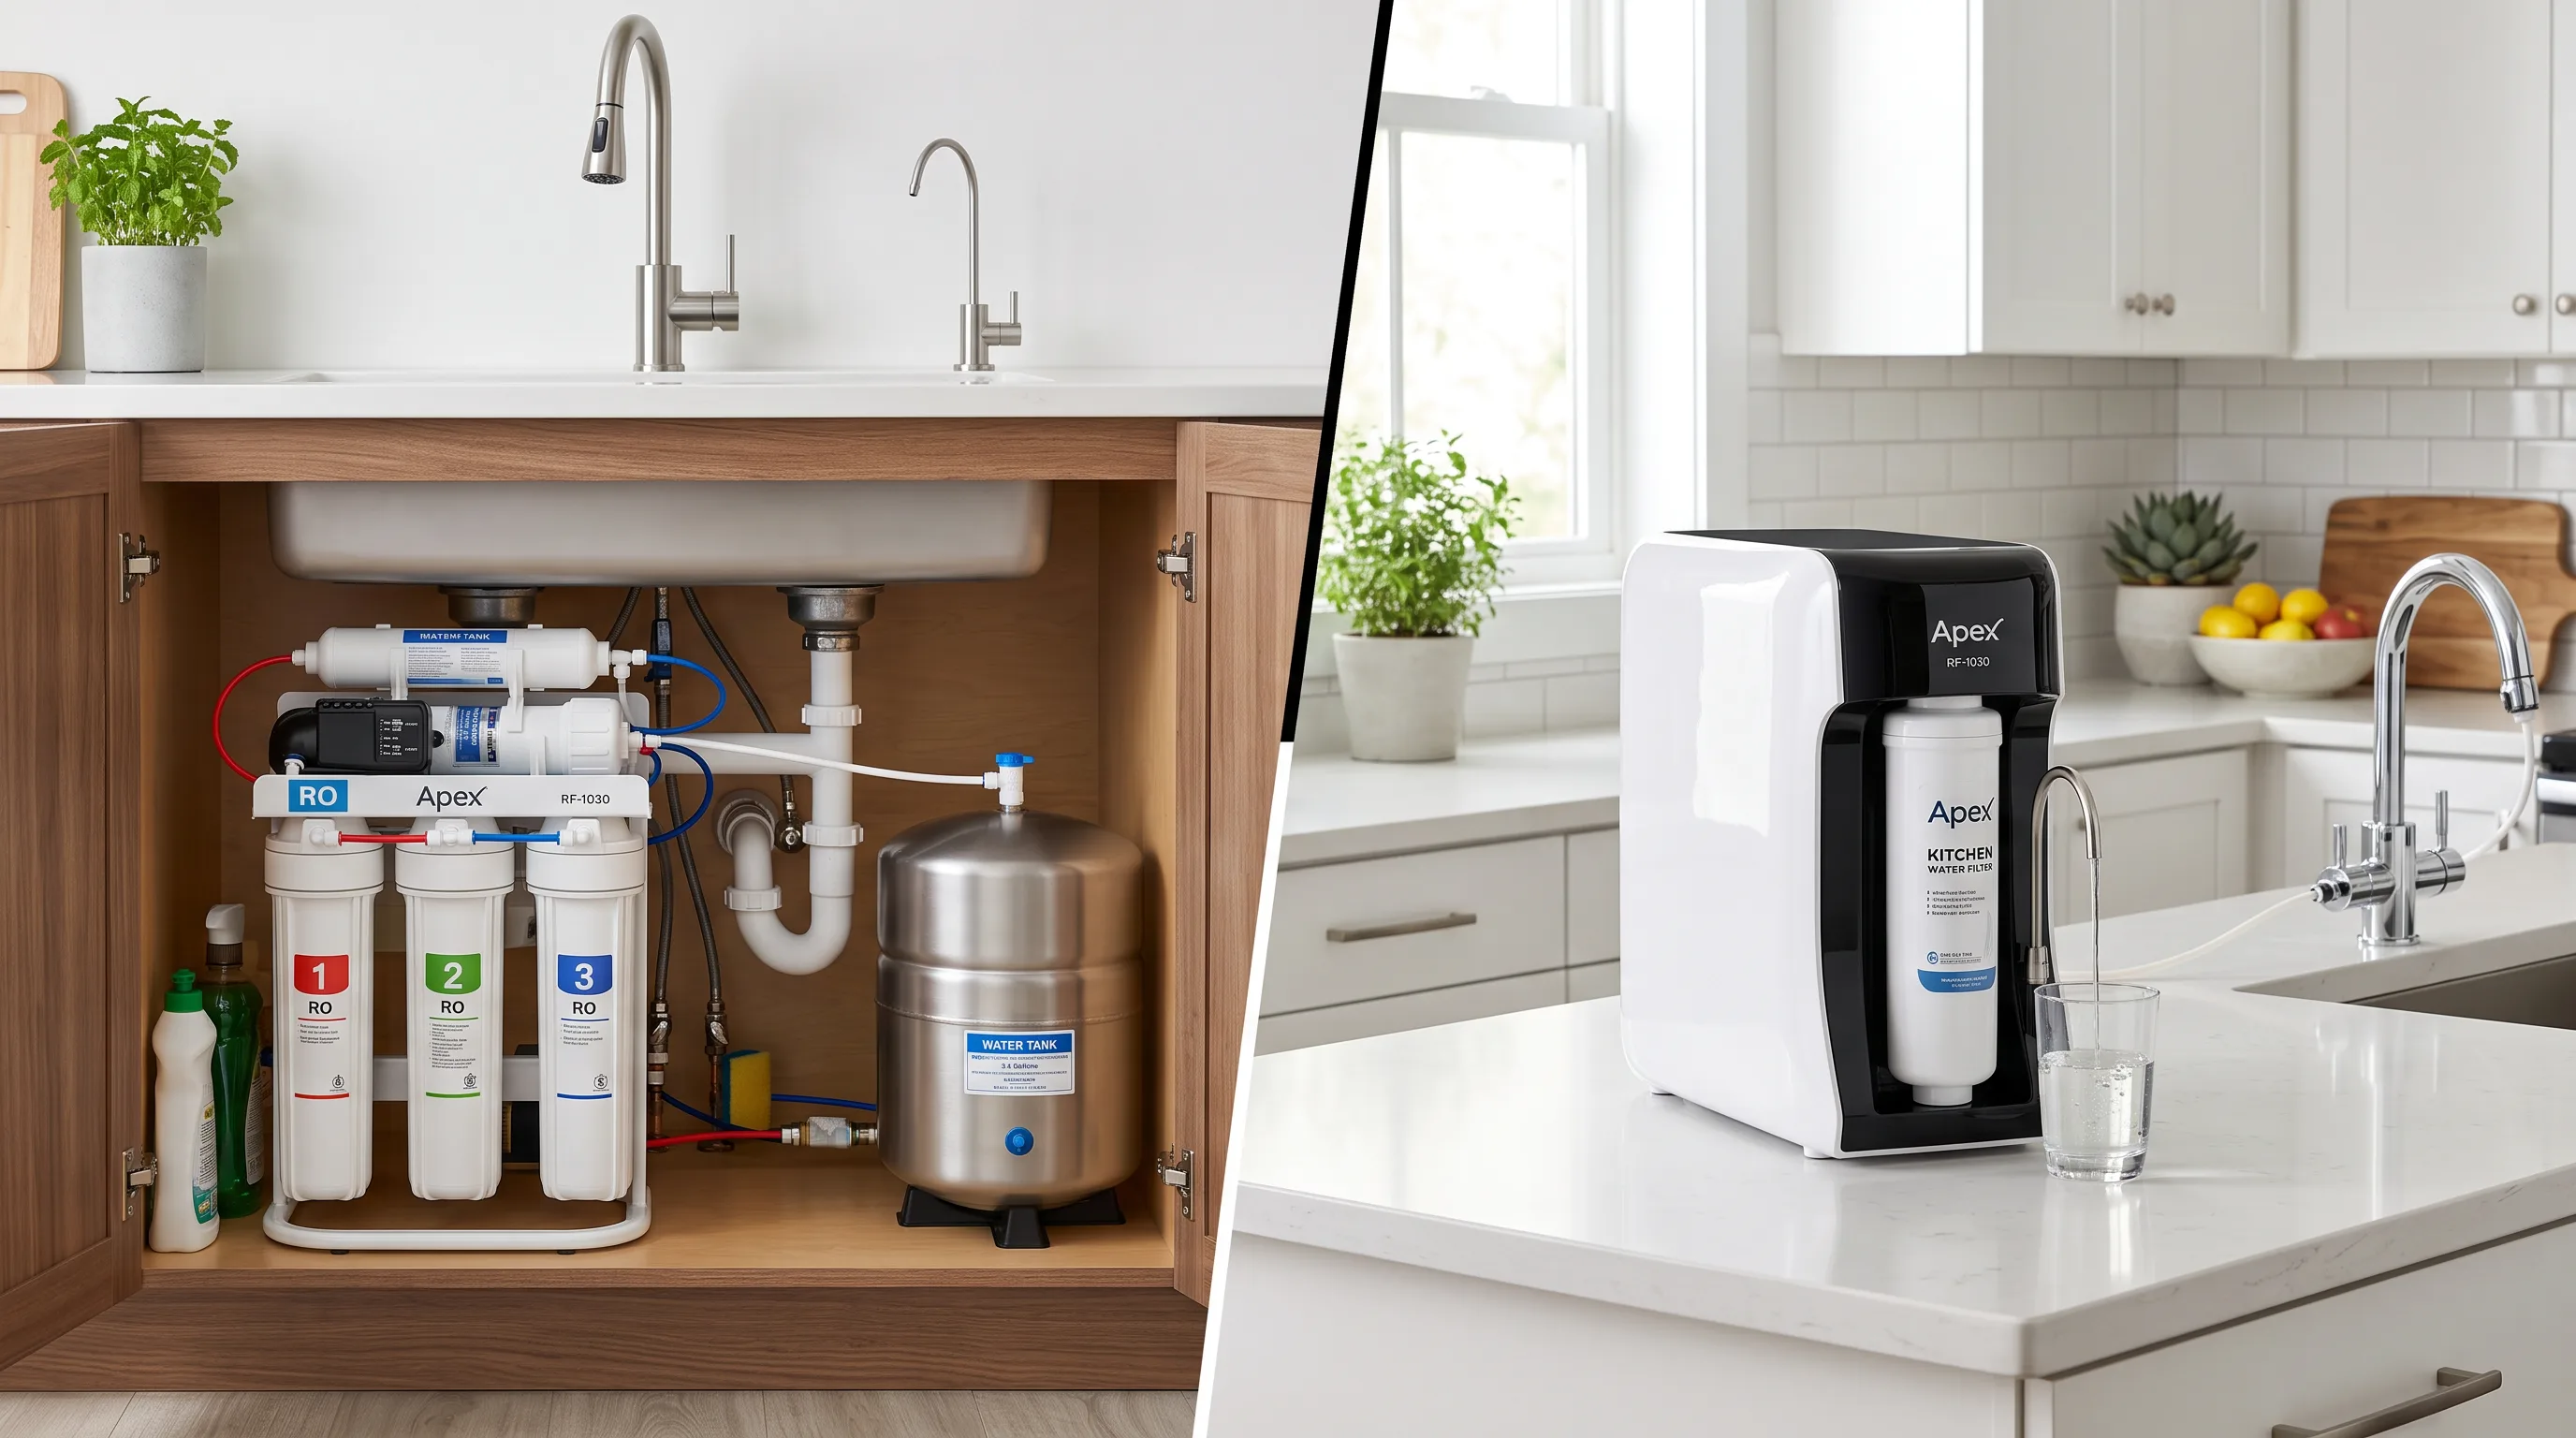
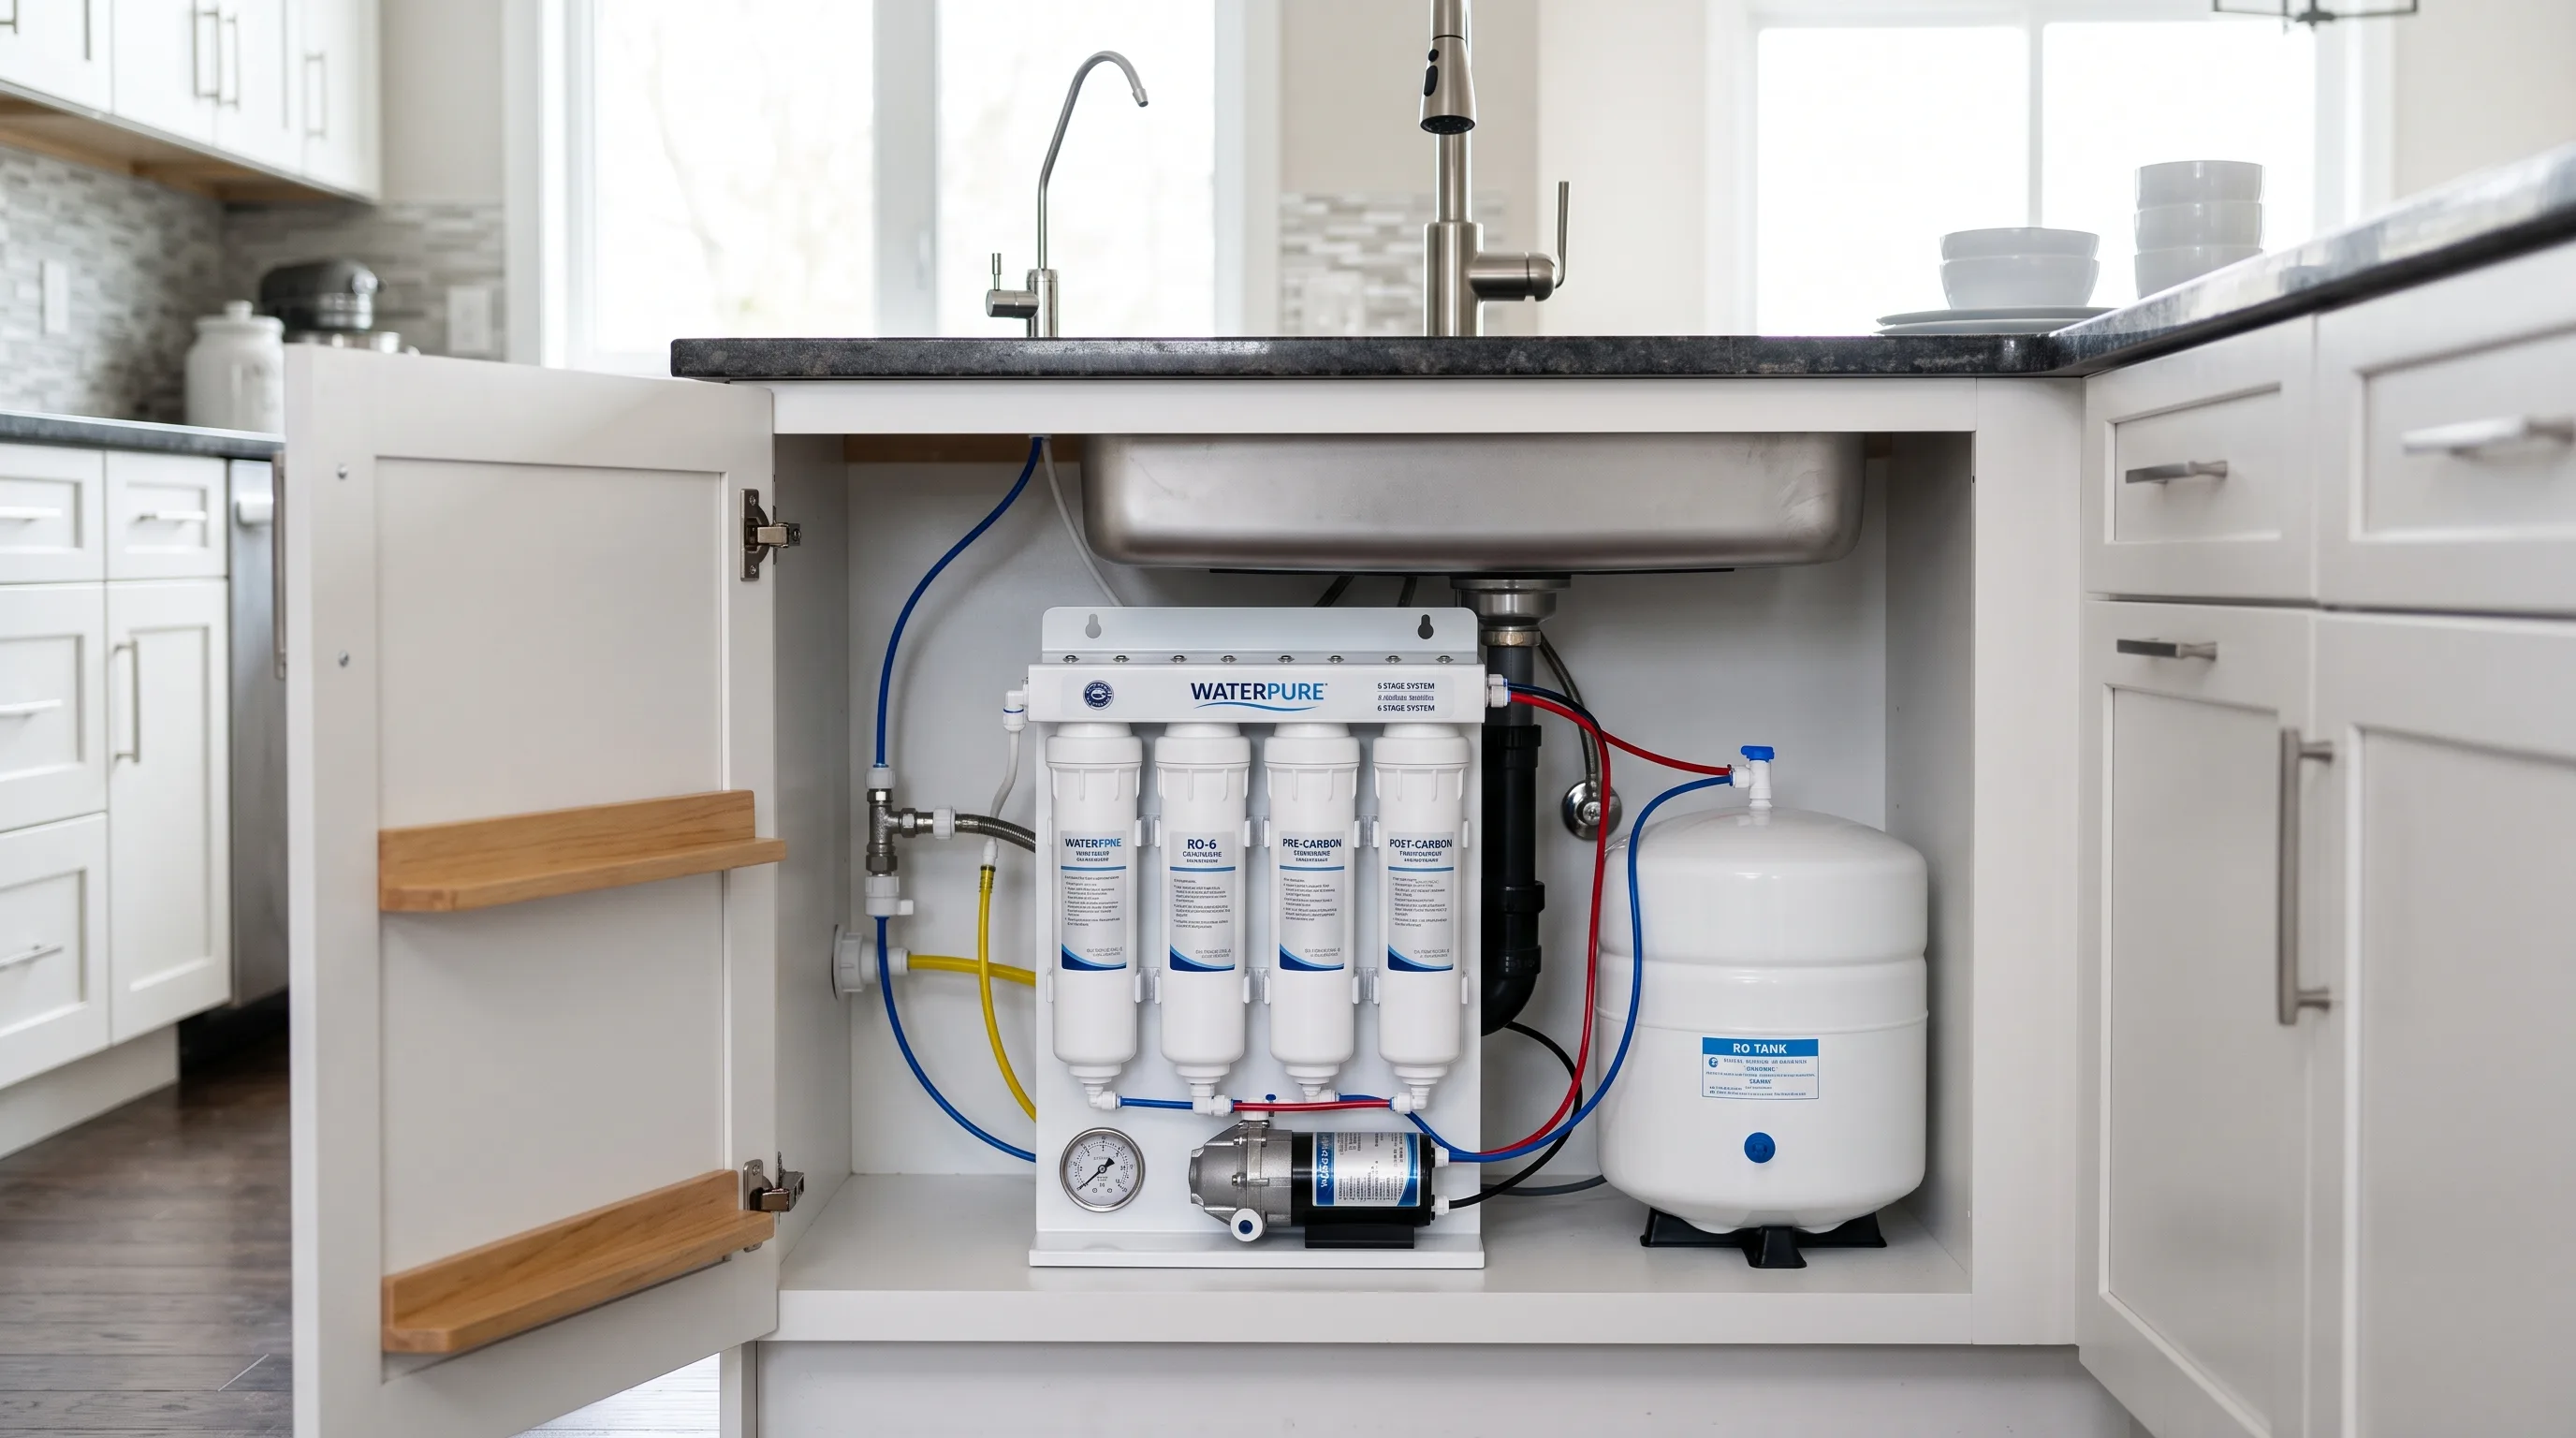
Under-sink RO systems. A multi-stage unit installed in the cabinet beneath your kitchen sink. Water passes through a sediment pre-filter, an activated carbon block, the RO membrane, and a post-carbon polishing filter. A small storage tank holds 2-4 gallons of treated water. These systems consistently deliver lead reduction above 99% because the RO membrane is a physical barrier—lead ions simply cannot pass through 0.0001-micron pores. Installation requires drilling a hole in the sink or countertop for the dedicated faucet and connecting to the cold water line. The tradeoff: they produce wastewater (typically 2-4 gallons of reject water per gallon of permeate for residential units), and the storage tank occupies under-sink space.
See how under-sink RO systems compare across our product line for specific models with NSF 53 certified lead reduction.
Countertop RO or multi-stage filter units. These sit on the counter and connect to the kitchen faucet via a diverter valve. No under-sink installation, no drilling, no permanent modification—ideal for renters, apartment dwellers, and anyone who doesn’t want to modify plumbing. The filtration is identical in specification to under-sink units. The tradeoff: counter space and a visible appliance on the countertop.
The Maintenance Reality: A Filter Only Works If It’s Changed
An NSF 53 certified filter that’s past its rated capacity is not a filter. It’s a housing unit with water flowing through exhausted media that may actually be shedding previously captured contaminants back into the water. The lead doesn’t disappear when the filter “fills up”—it stays in the media matrix, and under certain water chemistry conditions, it can desorb.
Filter replacement schedules by technology:
| Filter Type | Replacement Interval | Cost per Replacement | Annual Cost |
|---|---|---|---|
| Under-sink RO membrane | 24-36 months | $40-80 | $20-40 |
| RO pre-filters (sediment + carbon) | 6-12 months | $15-30 per set | $30-60 |
| RO post-carbon polishing filter | 12 months | $15-25 | $15-25 |
| Countertop multi-stage filter cartridge | 6-12 months (varies by capacity) | $25-50 | $50-100 |
| Faucet-mounted NSF 53 filter | 3 months or 100 gallons | $15-20 | $60-80 |
| Pitcher-style NSF 53 filter | 2 months or 40 gallons | $8-12 | $48-72 |
These costs assume you’re buying replacement cartridges directly. If you go with a proprietary system from a brand that locks you into their filter ecosystem, multiply these numbers by 1.5-2x.
One practical tip from years of watching filter maintenance: mark the replacement date on the filter housing with a Sharpie. The sticker reminder systems work on phones—until you change phones or dismiss the notification. A physical date written on the housing doesn’t require a battery, doesn’t get dismissed, and stares at you every time you open the cabinet.
Bottled Water Is Not the Answer—Here’s the Math
When the lead test comes back positive, the short-term reflex is to switch to bottled water. Let’s run the numbers for a family of four drinking the recommended 8 cups (half-gallon) of water per person per day:
Daily water needed: 2 gallons for drinking. Add another gallon for cooking (pasta water, soup, coffee). Total: 3 gallons/day.
At $1.00-1.50 per gallon for bottled water, that’s $3.00-4.50/day, or $1,095-1,642/year.
An under-sink RO system with NSF 53 certification costs $200-400 installed (if you DIY the installation; add $150-250 for professional install). Annual filter replacements: $65-125. Total first-year cost: $265-525. Every year after: $65-125.
The RO system pays for itself in 3-6 months compared to bottled water, and you’re not generating 1,000+ plastic bottles of waste per year. For a detailed breakdown of under-sink installation, check our water filtration guides.
Corrosion Control: What Your Water Utility Is (and Isn’t) Doing
The EPA’s Lead and Copper Rule (first issued 1991, most recently revised 2024 as the Lead and Copper Rule Improvements) requires water systems serving more than 50,000 people to maintain corrosion control treatment. The most common method is orthophosphate addition—injecting phosphoric acid or zinc orthophosphate at the treatment plant to form a stable lead-phosphate mineral layer on pipe interiors.
This works. When orthophosphate dosing is maintained at 1-3 mg/L as PO₄, lead release drops by 80-95% in most distribution systems. The problem is that orthophosphate control requires continuous monitoring and adjustment. A phosphate feed pump failure, a supply chain disruption, or a change in source water that alters the optimal dosage can create a window where the protective layer breaks down. Your water could test fine for years and then spike during a single event.
The 2024 Lead and Copper Rule Improvements also mandated that all lead service lines be replaced within 10 years—but “mandated” and “funded” are different things. The EPA has allocated $15 billion through the Bipartisan Infrastructure Law for lead pipe replacement, against an estimated total need of $45-60 billion. The funding gap means replacement timelines will vary dramatically by municipality. Some cities are on track for 5-7 year completion. Others are looking at 2035 or later.
The practical implication for you as a homeowner: your water utility’s corrosion control is a layer of protection, but not a guarantee. A point-of-use filter provides a second, independent barrier. If the utility’s orthophosphate treatment falters for 48 hours, your kitchen tap filter catches what gets through.
What ONEMI’s Approach Looks Like
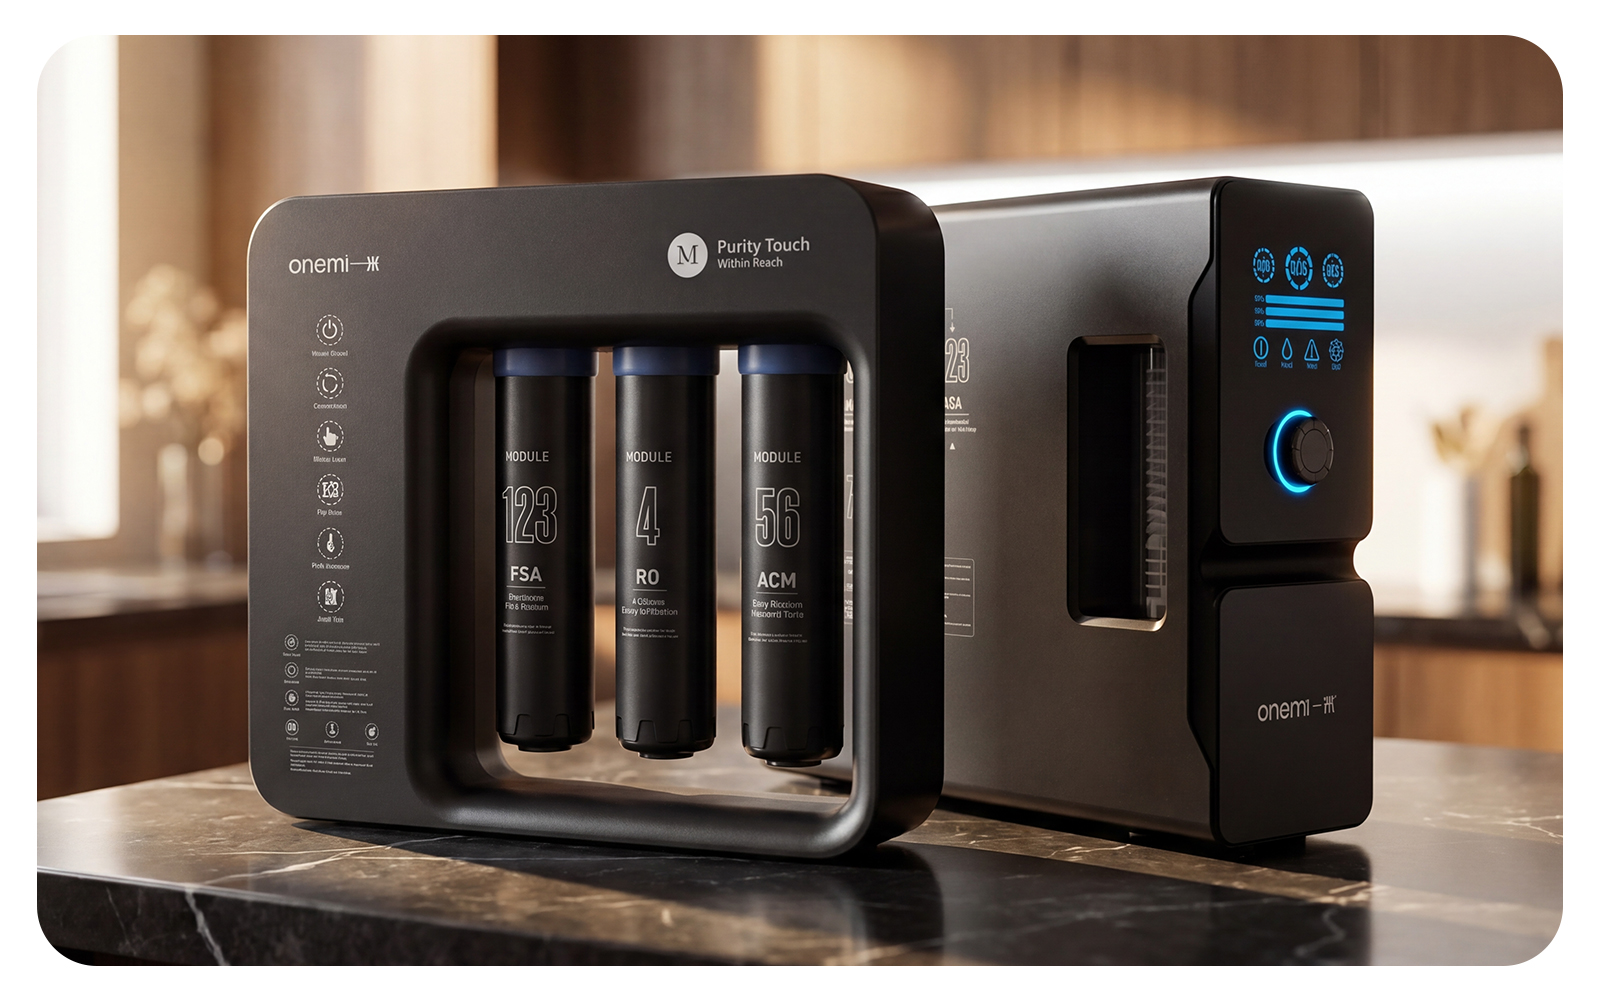
ONEMI, a Guangdong-based water purification equipment manufacturer, builds under-sink RO systems designed around multi-stage filtration with NSF/ANSI 53 certified lead reduction capability. The approach isn’t complicated: a sediment pre-filter catches particulates that could foul the membrane, an activated carbon block handles chlorine and organic compounds, the RO membrane rejects dissolved solids including lead ions, and a post-carbon stage polishes taste.
The key spec to look at is the RO membrane’s rejection rate. A thin-film composite (TFC) polyamide membrane with 0.0001-micron pore size, when operated at 50-80 psi feed pressure, achieves 95-99% rejection of dissolved lead. At inlet concentrations of 150 ppb (the NSF 53 challenge level), outlet concentrations fall to 1.5-7.5 ppb—comfortably below the 10 ppb certification threshold and approaching the 1 ppb MCLG that the EPA considers the public health goal.
For homes where under-sink installation isn’t feasible—rental properties, historic buildings with fragile plumbing, kitchens with no cabinet space—a countertop RO unit provides the same filtration in a portable form factor that connects to the existing faucet. The performance is identical; the tradeoff is aesthetics and counter space.
If you’re evaluating options, the ONEMI product range includes both form factors. Compare specifications side by side on the products page, paying attention to the NSF 53 listing for each model.
The Bottom Line: A Checklist for Older-Home Owners
If you live in a pre-1986 home and you’re concerned about lead in your drinking water, here’s the sequence that actually works—not the theoretical version you’ll find in government pamphlets:
1. Test your water. Pay for an EPA-certified lab test with a first-draw sample. This gives you a baseline number. If the result is above 1 ppb (the MCLG), you have a lead issue worth addressing, regardless of whether it’s below the 15 ppb action level that triggers utility intervention.
2. Map your plumbing. Identify your service line material. If it’s lead and you’re in a municipality with an active replacement program, get on the list. If you’re not, understand that service line replacement is likely years away and filtration is your near-term solution.
3. Install a point-of-use NSF 53 certified filter at the kitchen sink. Under-sink RO is the most complete solution. Countertop or faucet-mounted NSF 53 units work if under-sink isn’t possible. Verify the certification by looking up the model number on the NSF website—do not trust the Amazon listing.
4. Use cold water for drinking and cooking. Hot water dissolves lead faster. If you’ve been filling your pasta pot from the hot water tap to save time, stop. Cold water only for consumption.
5. Flush the pipes if water has been sitting. If no one has used the kitchen faucet for 6+ hours (overnight, or returning from work), run the cold water for 30-60 seconds before filling a glass or pot. This flushes the water that’s been in contact with pipes and fixtures. If you have an NSF 53 filter installed, this step becomes far less critical—but it’s still a good habit.
6. Track your filter replacement schedule. Set calendar reminders. Write dates on filter housings. The best filtration system in the world is useless with an exhausted cartridge.
7. Re-test annually. Water chemistry changes seasonally. A clean test in March doesn’t guarantee a clean test in August when reservoir turnover changes source water pH. Annual testing catches trends before they become problems.
Lead in drinking water is a solvable problem. It doesn’t require moving, doesn’t require waiting for municipal infrastructure projects, and doesn’t require spending thousands of dollars per year on bottled water. A properly selected and maintained NSF 53 point-of-use filtration system—verified by independent lab testing, backed by transparent manufacturer specifications—delivers water you can trust from the tap you already have.
For more on water filtration standards and what different certifications actually mean, see our certifications reference.
Faucet-Mounted vs. Pitcher Filters: The Convenience Trap
Walk down the water filtration aisle at any big-box store and you’ll see two products that dominate shelf space: faucet-mounted filters and filter pitchers. Both are cheap, both are easy to install, and both are almost certainly inadequate for lead removal in a pre-1986 home.
The core problem is contact time. Lead adsorption onto activated carbon or ion-exchange media is not instantaneous—it requires the water to be in physical contact with the filtration media for a minimum residence time, typically measured in seconds. Faucet-mounted filters, constrained by the need to deliver water at a usable flow rate (0.5 GPM or higher), pass water through a relatively small media bed in a fraction of a second. The result: some lead ions make it through without ever touching an adsorption site.
Filter pitchers face the opposite problem: they have sufficient contact time because water trickles through by gravity, but the total media volume in a pitcher cartridge is tiny—typically 50-100 grams of carbon blend compared to 500-1,500 grams in a full-size under-sink carbon block. The small media bed saturates faster, and once saturated, lead passes through unimpeded.
There are exceptions. A small number of faucet-mounted and pitcher filters carry NSF/ANSI 53 certification specifically for lead. PUR’s Plus faucet mount and ZeroWater’s pitcher are among them. If you’re in a situation where under-sink or countertop installation is genuinely impossible—a dorm room, a temporary rental, a hotel extended stay—an NSF 53 certified pitcher or faucet mount is better than nothing. But understand the limitations: the rated capacity for lead removal on these compact filters is typically 30-100 gallons, after which the cartridge must be replaced. If your household goes through 3 gallons of drinking water per day, you’re replacing a faucet mount cartridge every 2-4 weeks and a pitcher filter every 1-3 weeks.
At $8-20 per replacement cartridge, the annual cost for a faucet-mounted or pitcher solution runs $200-500/year—more than the total cost of an under-sink RO system with its annual filter replacements. The cheap upfront price is a mirage. The per-gallon cost is what matters, and on that metric, compact filters are the most expensive option on the market.
Well Water and Lead: A Different Risk Profile
The national conversation about lead in drinking water focuses almost entirely on municipal water systems and their aging distribution infrastructure. But 43 million Americans—roughly 15% of the population—get their water from private wells. Well water doesn’t travel through municipal lead service lines. Does that mean well owners are safe?
Not necessarily. The lead risk for well water doesn’t come from the source—groundwater in most regions has naturally low lead concentrations, typically below 1 ppb. The risk comes from the well’s own plumbing. Submersible well pumps manufactured before 1995 often contain brass components with lead content up to 8%. The drop pipe connecting the pump to the surface may be galvanized steel with lead-bearing zinc coatings. The pressure tank, the brass check valves, the fittings at every connection point—each represents a potential lead source.
Adding to the challenge: well water tends to be more corrosive than treated municipal water. Without the pH adjustment and orthophosphate addition that municipal systems provide, well water with naturally low pH (common in the Northeast and Pacific Northwest where granite bedrock produces acidic groundwater) will aggressively leach lead from any brass or solder in the plumbing system. A well owner’s lead risk is entirely self-managed—no utility is monitoring it, no corrosion control is being applied, and no annual water quality report arrives in the mail.
The testing recommendation for well owners is annual comprehensive testing including lead, arsenic, nitrates, coliform bacteria, and a full mineral panel. State cooperative extension services often offer subsidized testing—check with your state’s land-grant university. If lead is detected, the filtration solution is identical to what a municipal water user would install: an NSF 53 certified point-of-use system. Whole-house treatment for lead is rarely justified on wells unless lead is showing up at multiple taps and the source has been definitively traced to the well pump or pressure tank rather than interior plumbing.
The Real Estate Angle: What a Lead Filter Does to Home Value
This is something no filter manufacturer will tell you in their marketing copy because it’s not about the filter—it’s about disclosure. In 37 states, residential real estate transactions require a seller’s property disclosure form that includes questions about known environmental hazards. Lead plumbing and lead in drinking water are explicitly covered under these disclosures in most jurisdictions.
If you’ve tested your water and found lead above the EPA action level of 15 ppb, you may have a legal obligation to disclose that finding to potential buyers when you sell the home. Failing to disclose known lead contamination can result in post-sale litigation—and plaintiffs’ attorneys have become increasingly active in this area since the Flint water crisis raised public awareness.
Installing an NSF 53 certified filtration system doesn’t erase the disclosure obligation, but it changes how the disclosure reads. “Lead detected at 22 ppb, no remediation” is very different from “Lead detected at 22 ppb, NSF 53 certified under-sink RO system installed 2026, post-installation test result below 1 ppb.” Buyers understand that old homes have old plumbing. What they want to see is that the problem has been professionally addressed with documented results.
Some homeowners take this a step further and document the entire process: pre-installation lab test, filter system invoice with model number, post-installation lab test showing lead reduction, and a maintenance log. When it’s time to sell, this documentation goes into the disclosure package. It demonstrates diligence and removes lead from the negotiation—literally and figuratively.
Children, Pregnancy, and Lead: The Stakes Are Unequal
Not everyone in a household faces the same level of risk from lead in drinking water. The physiological differences are stark enough that they should drive decision-making about when and how aggressively to filter.
Infants fed formula mixed with tap water are at the highest risk. A formula-fed infant consumes roughly 4-6 ounces of water per feeding, 6-8 times per day—that’s 24-48 ounces of water daily for a body that weighs 8-15 pounds. The dose of lead per kilogram of body weight is orders of magnitude higher than for an adult drinking the same water. The developing brain, with its rapidly forming neural connections, is exquisitely sensitive to lead’s neurotoxic effects. Blood lead levels as low as 3.5 micrograms per deciliter—the CDC’s current reference level—have been associated with measurable cognitive deficits in longitudinal studies.
Pregnant women face a dual risk. Lead stored in the mother’s bones from lifetime exposure is mobilized during pregnancy as calcium is drawn from bone to build the fetal skeleton. This means the fetus can be exposed to lead even if the mother’s current drinking water is clean—but adding lead from tap water on top of that baseline exposure pushes the total dose higher. Lead crosses the placental barrier freely, and fetal blood lead levels closely track maternal levels.
For households with infants, pregnant women, or young children, the threshold for action should be lower. The EPA’s 15 ppb action level is an infrastructure management trigger, not a health-based threshold. If you have vulnerable individuals in the home and a first-draw lead test shows any level above 1 ppb (the MCLG), install filtration. The cost of an under-sink RO system—$200-400 installed—is negligible compared to the stakes involved.
Multi-Stage Filtration: Why One Filter Stage Isn’t Enough
A common point of confusion in water filtration is the belief that a single filtration stage handles everything. It doesn’t. Effective lead removal in a residential setting almost always requires multi-stage filtration, and understanding what each stage does will help you evaluate systems intelligently instead of getting lost in marketing claims.
Stage 1: Sediment pre-filter (5 micron polypropylene). This catches sand, rust particles, silt, and suspended solids. It doesn’t remove lead—lead is dissolved, not particulate—but it protects the downstream stages from clogging. Without a sediment pre-filter, the carbon block and RO membrane would foul prematurely. Replace every 6-12 months. Cost: $3-8.
Stage 2: Activated carbon block (granular or extruded). This removes chlorine, chloramine, volatile organic compounds, and improves taste and odor. Some carbon blocks are formulated with adsorptive additives (powdered activated carbon with enhanced surface chemistry) that provide partial lead removal as a bonus—but unless the entire system carries NSF 53 certification, don’t count on the carbon block alone for lead. Replace every 6-12 months. Cost: $10-20.
Stage 3: Reverse osmosis membrane (thin-film composite polyamide). This is the workhorse for lead removal. The membrane’s 0.0001-micron pores are small enough to reject dissolved ions including lead, arsenic, chromium-6, nitrate, and sodium. The membrane also rejects 95-99% of total dissolved solids (TDS). The RO membrane is the reason an under-sink RO system can deliver lead reduction from 150 ppb down to single-digit ppb. Replace every 24-36 months. Cost: $40-80.
Stage 4: Post-carbon polishing filter (inline granular activated carbon). After the RO storage tank, water passes through a final carbon stage to remove any taste or odor picked up from the tank or plumbing. This stage doesn’t contribute to lead removal—the lead is already gone—but it’s essential for taste quality. Replace every 12 months. Cost: $10-15.
The sequence matters. Sediment→Carbon→RO membrane→Polishing is the correct order. Systems that rearrange this—for example, placing the carbon block after the RO membrane—are compromising performance. The carbon block protects the RO membrane from chlorine, which degrades polyamide membranes. Carbon-after-RO is a polishing stage only.
Some systems add a remineralization stage (calcite or mineral cartridge) after the RO membrane. This adds calcium and magnesium back to the water for taste. It’s optional—it neither helps nor hurts lead removal—but many people prefer the taste of remineralized RO water compared to the flat taste of pure RO permeate.
For those maintaining their own systems, we stock replacement filter cartridges covering all stages. Make sure to match cartridge dimensions to your system’s housing—standard 10-inch housings take 2.5 x 10 inch cartridges, but some compact under-sink units use proprietary sizes.
How to Actually Verify an NSF 53 Certification
I mentioned earlier that you should verify NSF certifications by looking up the model number on NSF’s website. Here’s the exact process, because the NSF website isn’t particularly intuitive:
Go to info.nsf.org/Certified/DWTU. That’s the Drinking Water Treatment Units directory. Enter the manufacturer name or model number. If the product is certified, you’ll see a listing that specifies exactly which NSF/ANSI standards it’s certified to, which contaminants it’s been tested for under each standard, and the claimed reduction percentage for each contaminant.
The important thing to look at is the “Claims” column. A product might be NSF 53 certified for cyst reduction or turbidity reduction but not specifically for lead. The certification number on the packaging doesn’t automatically mean lead is covered—you need to verify that lead appears in the claims list. A product that says “NSF/ANSI 53 Certified” on the box but doesn’t list lead in its NSF claims is certified for something under Standard 53 but not for lead removal.
This is not a hypothetical distinction. Multiple major brands sell filters that carry the NSF 53 mark for cyst or turbidity reduction while not being certified for lead. The packaging says “NSF 53 Certified” and the consumer assumes lead is covered. It’s legal. It’s technically accurate. And it’s misleading in exactly the way that matters for an older-home owner.
While you’re on the NSF listing, also check the rated capacity. The certification specifies a gallon capacity—for example, “Lead reduction tested and certified to 750 gallons.” A filter certified for 750 gallons of lead reduction that’s used in a household consuming 3 gallons of drinking water per day will need replacement every 250 days—roughly every 8 months. After gallon 751, the certification no longer applies and lead breakthrough may begin.
Installation Realities: What Your Kitchen Layout Dictates
Under-sink RO installation is straightforward in theory and annoying in practice—not because the plumbing work is difficult, but because the space under a kitchen sink is usually occupied by garbage disposals, cleaning supplies, dish soap bottles, and a tangle of supply lines and drain pipes.
Before you buy a system, measure the available space under your sink. A standard residential under-sink RO unit with a 3-4 gallon storage tank needs approximately 18 inches of width, 14 inches of depth, and 18 inches of height. The tank alone is roughly 11 inches in diameter and 14 inches tall. If you have a garbage disposal on one side and a deep sink basin that protrudes into the cabinet, you may need to reposition items.
The installation itself involves three connections: a feed water adapter that tees into the cold water supply line (under the shutoff valve), a drain saddle that clamps onto the sink drain tailpiece for the reject water line, and the dedicated faucet that mounts through a hole in the sink or countertop. If your sink doesn’t have a pre-drilled hole for a soap dispenser or sprayer—common on older porcelain sinks—you’ll need to drill through the sink material or mount the faucet through the countertop instead.
Drilling through stainless steel sinks requires a step bit and cutting oil. Drilling through granite or quartz countertops requires a diamond hole saw and patience. If either of these sounds like more than you want to tackle, a countertop RO unit that connects to the existing faucet via diverter valve is the zero-drill alternative. Same filtration. Same certification. No permanent modification.
For apartment renters, check your lease before drilling anything. Many leases explicitly prohibit modifications to plumbing or countertops. A countertop unit with a faucet diverter is typically lease-compliant because it attaches and detaches without tools and leaves no trace when removed. Take photos of the faucet before installation so you can restore it exactly when you move out.
Total Cost of Ownership: The Numbers Most Buyers Miss
Water filter pricing follows the same pattern as inkjet printers: the hardware is cheap, the consumables are where the money is. When you’re comparing systems, look past the purchase price and calculate the 5-year total cost.
Here’s the breakdown for a typical under-sink RO system:
| Cost Item | Year 1 | Year 2 | Year 3 | Year 4 | Year 5 |
|---|---|---|---|---|---|
| System purchase | $250 | $0 | $0 | $0 | $0 |
| Installation (DIY) | $0 | $0 | $0 | $0 | $0 |
| Sediment + carbon pre-filters (2x/year) | $40 | $40 | $40 | $40 | $40 |
| RO membrane (every 3 years) | $0 | $0 | $60 | $0 | $0 |
| Post-carbon filter (1x/year) | $12 | $12 | $12 | $12 | $12 |
| Water cost (reject water, ~$0.005/gal) | $5 | $5 | $5 | $5 | $5 |
| Annual Total | $307 | $57 | $117 | $57 | $57 |
5-year total: $595. Per day over 5 years: $0.33. Per gallon (assuming 3 gallons/day): $0.11.
Compare to bottled water at $1.00/gallon: $5,475 over 5 years. The RO system saves roughly $4,880 per 5-year period per household. That’s before accounting for the gasoline and time spent hauling cases of water from the store, the refrigerator space occupied by water bottles, and the environmental cost of 5,475 plastic bottles.
The countertop version costs about $50-100 more upfront but has identical consumable costs. The payback period extends by about 2 months. Still well under a year.
What About Whole-House Carbon Tanks and Backwashing Filters?
Some homeowners, after discovering lead in their water, jump straight to considering a whole-house treatment system—a large carbon tank with automatic backwash valve installed at the main water line. This is almost always the wrong approach for lead and here’s why in detail.
A whole-house carbon tank sized for a typical 3-bedroom home—say, a 10″ x 54″ tank containing 1.5 cubic feet of activated carbon—is designed for flow rates of 8-12 gallons per minute to support simultaneous shower, laundry, dishwasher, and toilet use. At those flow rates, the empty bed contact time (EBCT) is typically 1-3 minutes. For chlorine removal, that’s fine. For lead adsorption onto carbon or ion-exchange media, it’s not enough.
Lead adsorption kinetics require EBCT of 5-10 minutes for 90%+ removal in a granular media bed. A whole-house tank simply can’t provide that at whole-house flow rates. If you slow the flow to extend contact time, you starve the shower and washing machine. If you oversize the tank to increase media volume, you’re looking at a 14″ x 65″ or larger tank, which costs $1,500-2,500 installed and occupies significant floor space in a basement or utility room.
There’s also the issue of intermittent use. A whole-house carbon tank sits stagnant for hours overnight. When the first shower turns on in the morning, the water that’s been marinating in the carbon bed for 8 hours gets pushed through to every tap in the house. If the carbon is near saturation for lead, this first-draw water can actually have higher lead concentration than the incoming water due to desorption. Point-of-use filters don’t have this problem because the volume of stagnant water in the system is measured in ounces, not gallons.
The right role for whole-house filtration in a lead context is complementary: install a sediment filter and carbon tank at the point of entry to handle particulate, chlorine, and general water quality improvement for the whole house. Then install the NSF 53 point-of-use system at the kitchen sink for drinking and cooking water. The whole-house system improves water quality for bathing and laundry. The point-of-use system handles the lead. They serve different purposes and should be evaluated independently.
The lead pipe infrastructure beneath America’s older neighborhoods will take decades to fully replace—the EPA’s own estimates put the total cost between $45 and $60 billion against roughly $15 billion currently allocated. In the meantime, the water entering your home continues its journey through pipes installed when lead was considered a good plumbing material and not a neurotoxin. An NSF 53 certified point-of-use filtration system at the kitchen sink is the most cost-effective, immediately available intervention. It costs less per day than a cup of coffee, installs in an afternoon, and produces water you can verify is clean with a follow-up lab test. For homes built before 1986, it’s not a luxury purchase—it’s the gap between what your municipal water utility can guarantee and what your 60-year-old plumbing actually delivers.