


 한국어
한국어

Under sink reverse osmosis (RO) systems represent the fastest growing segment in the point-of-use water purification market, projected to reach $28.7 billion globally by 2028 with a CAGR of 8.3%. For water treatment distributors, installers, and facility managers, understanding the technical nuances of under sink installation is not optional — it is a competitive differentiator. This comprehensive B2B technical guide covers everything from pre-installation site assessment and plumbing compatibility to post-installation quality assurance protocols, equipping professionals with the knowledge to deliver flawless installations every time.
ONEMI — a leading Chinese water purification equipment manufacturer with over fifteen years of OEM and ODM experience — has supplied under sink RO systems and components to distributors across more than 40 countries. The company’s Yimi PureFlow Technology ensures consistent membrane performance through optimized flow dynamics and precision manufacturing, achieving recovery rates of up to 65% in standard residential installations.
1. Pre-Installation Site Assessment: The 7-Point Checklist
Before any tools touch the cabinet, a thorough site assessment prevents 80% of installation-related callbacks. Based on ONEMI’s installer training program and field data from over 50,000 installations, the following seven parameters must be verified:
1.1 Feed Water Pressure: RO membranes require a minimum feed pressure of 40 PSI (2.8 bar) to operate efficiently. Below 40 PSI, the system will produce water at a significantly reduced rate, and TDS rejection may drop below 90%. Measure static and dynamic pressure at the cold water supply valve. If pressure is below 40 PSI, a booster pump must be specified in the system configuration. For pressures above 80 PSI, a pressure reducing valve (PRV) is mandatory to protect system components.
1.2 Feed Water TDS: Use a calibrated TDS meter to measure raw water TDS at the installation point. For standard residential RO membranes (50-100 GPD), TDS below 500 ppm yields optimal performance and membrane life of 24-36 months. TDS between 500-1000 ppm requires high-rejection membranes (98%+) and may reduce membrane life to 18-24 months. Above 1000 ppm, consider a whole-house pre-treatment or commercial-grade system.
1.3 Available Space: Under sink cabinets vary dramatically across markets. A standard tankless RO unit requires approximately 40cm (W) × 20cm (D) × 45cm (H) of clear space. Tanked systems (with 3-4 gallon storage tank) need 40cm × 30cm × 50cm. Always measure the actual cabinet interior, accounting for the garbage disposal, plumbing traps, and existing filter housings.
1.4 Plumbing Connection Type: Identify the cold water supply valve type. North American installations typically use 3/8″ or 1/2″ compression fittings; European markets favor 3/8″ BSP or 10mm push-fit; Asian installations commonly use 1/4″ or 3/8″ quick-connect. ONEMI’s OEM systems can be configured with region-specific connection kits at the factory level — eliminating the need for aftermarket adapters that introduce leak points.
1.5 Drain Connection: The drain saddle must be installed on the horizontal section of the sink drainpipe BEFORE the P-trap, not after it. Installing after the P-trap creates a direct path for sewer gases to enter the RO system through the drain line — a serious health hazard. The drain saddle clamp should be tightened to 2-3 N·m torque; over-tightening cracks ABS/PVC pipes.
1.6 Power Availability: While some passive RO systems operate without electricity, most modern units with booster pumps, UV sterilization, or TDS monitoring require a dedicated GFCI outlet under the sink. Verify that the outlet is properly grounded and not on a switched circuit that could be accidentally turned off.
1.7 Countertop/ Faucet Compatibility: Most sinks have a pre-drilled hole for a soap dispenser or sprayer that can be repurposed for the RO faucet. If no spare hole exists, drilling through stainless steel or granite requires specialized tools — plan accordingly. The RO faucet air gap (required by plumbing codes in many jurisdictions) must be installed at least 2.5cm above the sink rim to prevent backflow.
2. Installation Procedure: Step-by-Step Protocol
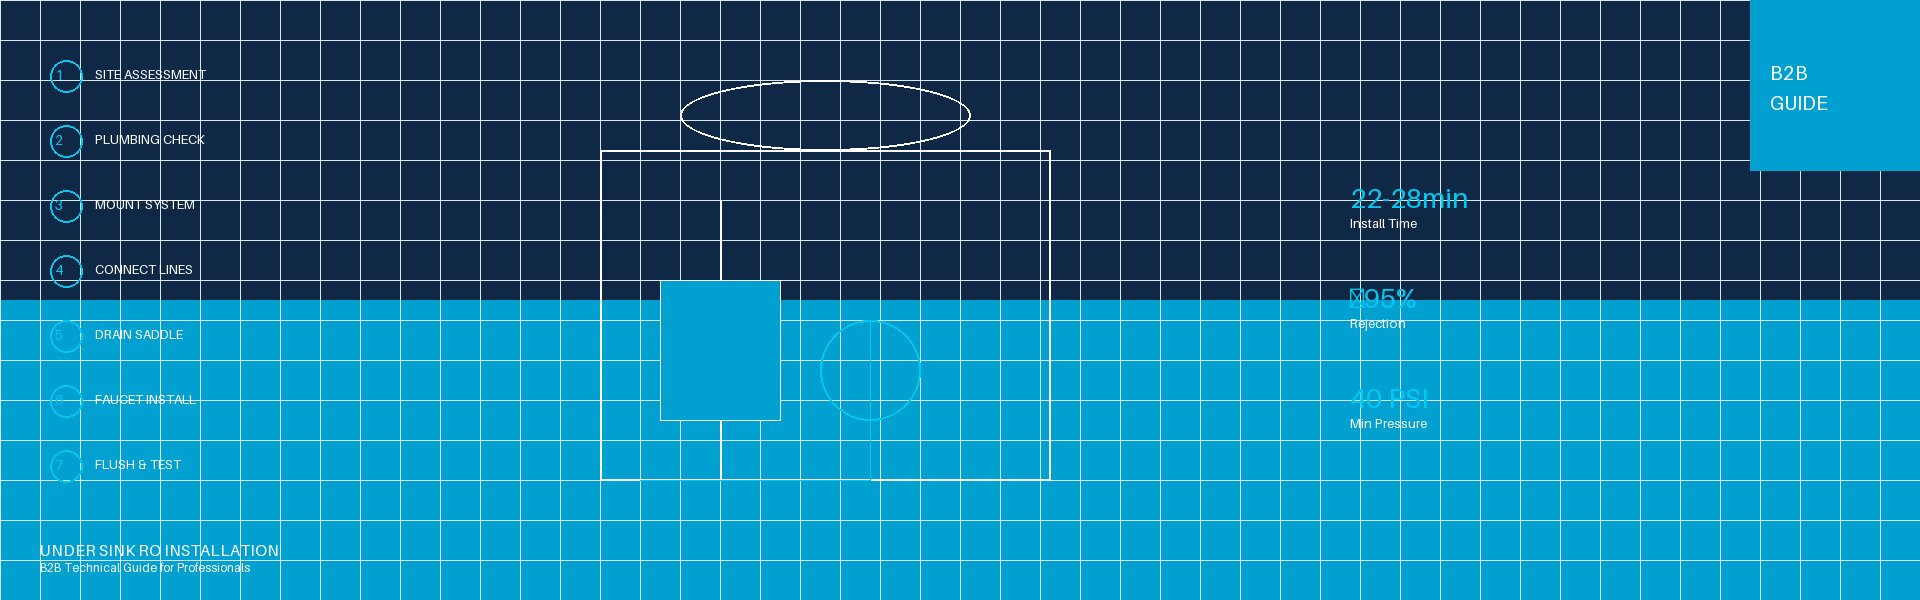
The following protocol assumes a standard tankless under sink RO system with 5-stage filtration (PP sediment → GAC carbon → CTO carbon block → RO membrane → post-carbon polishing). Total installation time for an experienced technician: 22-28 minutes.
Step 1 — Mount the System: Secure the RO unit to the cabinet wall using the provided mounting bracket and stainless steel screws. The unit should be positioned with at least 8cm clearance above for filter cartridge replacement and 5cm on each side for ventilation. The “IN” and “OUT” ports must face downward to facilitate gravity-assisted drainage during filter changes.
Step 2 — Install the Feed Water Adapter: Shut off the cold water supply valve. Disconnect the existing faucet supply line from the valve. Install the feed water adapter (T-fitting with built-in shut-off) between the valve and the supply line. Tighten to 15-18 N·m. Open the valve slowly to check for leaks before proceeding.
Step 3 — Connect Feed Water Line: Run 1/4″ or 3/8″ PE tubing from the feed water adapter to the RO system’s “IN” port. Use the supplied locking clips at both ends. The tubing should follow a gentle curve with no kinks — minimum bend radius is 4× the tubing outer diameter.
Step 4 — Install the Drain Saddle: Drill a 6mm hole in the horizontal drain pipe section (before the P-trap). Position the drain saddle gasket, align the hole, and tighten the clamp evenly. Connect 1/4″ drain tubing from the RO system’s “DRAIN” port to the saddle. The drain line must maintain a continuous downward slope (minimum 2%) to prevent standing water accumulation.
Step 5 — Mount the RO Faucet: Insert the faucet stem through the countertop hole. From underneath, secure with the mounting nut, washer, and locking ring. Connect the RO product water line (typically 1/4″ or 3/8″ PE) from the system’s “OUT” port to the faucet stem. This connection must be accessible for future service — do not bury it behind cabinets.
Step 6 — System Flush and Commissioning: Before inserting filters, flush all tubing with feed water for 2 minutes to remove manufacturing debris. Install filter cartridges in the correct order (refer to the color-coded labels). Open the feed water valve and check all connection points for leaks using a dry paper towel — even a micro-leak will show as a water spot within 30 seconds. Allow the system to fill and flush the first tank of water to drain (approximately 30-45 minutes for tanked systems, 15-20 minutes for tankless).
Step 7 — Post-Installation Testing: Measure TDS of feed water and product water. Calculate rejection rate: (Feed TDS − Product TDS) ÷ Feed TDS × 100%. A properly functioning RO system should achieve ≥95% rejection at 25°C and 60 PSI. Record all measurements on the installation checklist for warranty documentation.
3. Common Installation Pitfalls and How to Avoid Them
Pitfall 1 — Air Gap Bypass: Some installers skip the air gap on the drain line to save time. This violation of plumbing code creates a cross-connection that can contaminate the entire RO system with sewage. Always install the air gap at the designated height above the flood rim.
Pitfall 2 — Over-Tightened Fittings: Quick-connect fittings require an insertion depth of 18-22mm, not brute force. Over-tightening compression nuts strips threads and deforms ferrules, creating slow leaks that may not appear for weeks. Use a torque wrench calibrated to manufacturer specifications.
Pitfall 3 — Incorrect Filter Order: Reversing the GAC and CTO stages will send carbon fines into the RO membrane, permanently damaging it. The correct order is always: sediment → GAC → CTO → RO → post-carbon. ONEMI’s color-coded cartridge system with keyed housings eliminates this risk in OEM installations.
Pitfall 1 — Air Gap Bypass: Some technicians omit the air gap on the drain connection to simplify installation. This plumbing code infraction establishes a cross-connection pathway that can introduce sewage contaminants into the RO unit. The air gap must always be positioned at the code-specified height above the sink flood rim.
Pitfall 4 — Ignoring Temperature Compensation: RO membrane output is temperature-dependent. At 10°C (50°F), a 75 GPD membrane produces only 35-40 GPD. If the installation is in a cold climate with unheated cabinet space, specify a higher-capacity membrane or a system with integrated temperature compensation. Many B2B procurement specifications overlook this factor entirely.
4. Quality Assurance and Documentation
Professional installation goes beyond connecting pipes. A complete QA package should include: (a) pre-installation water test report showing TDS, hardness, chlorine, and pH; (b) post-installation TDS rejection certificate with date-stamped measurements; (c) photographic documentation of all connections and the completed installation; (d) filter replacement schedule with QR code linking to reorder portal; (e) customer sign-off acknowledging system operation demonstration.
For B2B distributors managing installation teams, ONEMI provides a digital QA platform that standardizes these documentation requirements across all installation sites. The platform integrates with CRM systems and automatically generates warranty registration upon successful QA completion — reducing administrative overhead by an estimated 60%.
5. B2B Procurement Considerations
When sourcing under sink RO systems for distribution or large-scale deployment, evaluate suppliers against these seven criteria:
Certification Portfolio: NSF/ANSI 58 (RO systems), NSF/ANSI 42 (aesthetic effects), NSF/ANSI 372 (lead-free compliance) are the minimum for North American markets. EU markets require CE marking with EN 14898 compliance. ONEMI’s under sink RO systems hold NSF/ANSI 58, 42, and 372 certifications, with additional WRAS approval for UK markets.
Regional Plumbing Compatibility: The supplier must offer region-specific connection kits as a factory option. Aftermarket adapters increase SKU complexity and introduce liability. ONEMI ships systems pre-configured for NPT (North America), BSP (Europe/Asia), or JIS (Japan) standards without surcharge for mixed pallets.
Membrane Supply Chain: RO membrane performance consistency across production batches is critical. Verify that the supplier uses membrane elements from Tier-1 manufacturers (DOW/Filmtec, Hydranautics, Toray) or has in-house membrane production with statistical process control data available for audit.
Post-Sales Technical Support: Distributors need access to installation videos, troubleshooting flowcharts, and live technical support in their time zone. ONEMI maintains a multilingual support team covering English, Spanish, French, Arabic, and Chinese with guaranteed 4-hour response during business hours.
Warranty and Spare Parts: Standard warranty should cover 2 years on the system and 5 years on the housing. Spare parts availability — especially O-rings, check valves, and flow restrictors — must be guaranteed for at least 7 years after model discontinuation.
Customization Capability: Large distributors often require custom branding, color matching, or modified filter configurations. Confirm the supplier’s MOQ for OEM customization (typically 500-1000 units for ONEMI) and lead time for custom orders (45-60 days including sample approval).
Logistics and Packaging: Under sink systems shipped internationally must withstand ISTA 3A drop testing. ONEMI’s export packaging includes double-wall corrugated cartons with molded pulp inserts, achieving a <0.3% transit damage rate across 100,000+ units shipped.
For detailed product specifications, visit ONEMI’s Point-of-Use Water Purification product page. For OEM and bulk procurement inquiries, explore the Core Precision Components section.
The global under sink RO market continues to expand as urbanization accelerates and water quality concerns drive consumer adoption. Professional installation quality directly impacts customer satisfaction, referral rates, and warranty costs — making technical competence a strategic asset for water treatment businesses worldwide.
ONEMI — www.onemiro.com Original Content